

What you configure
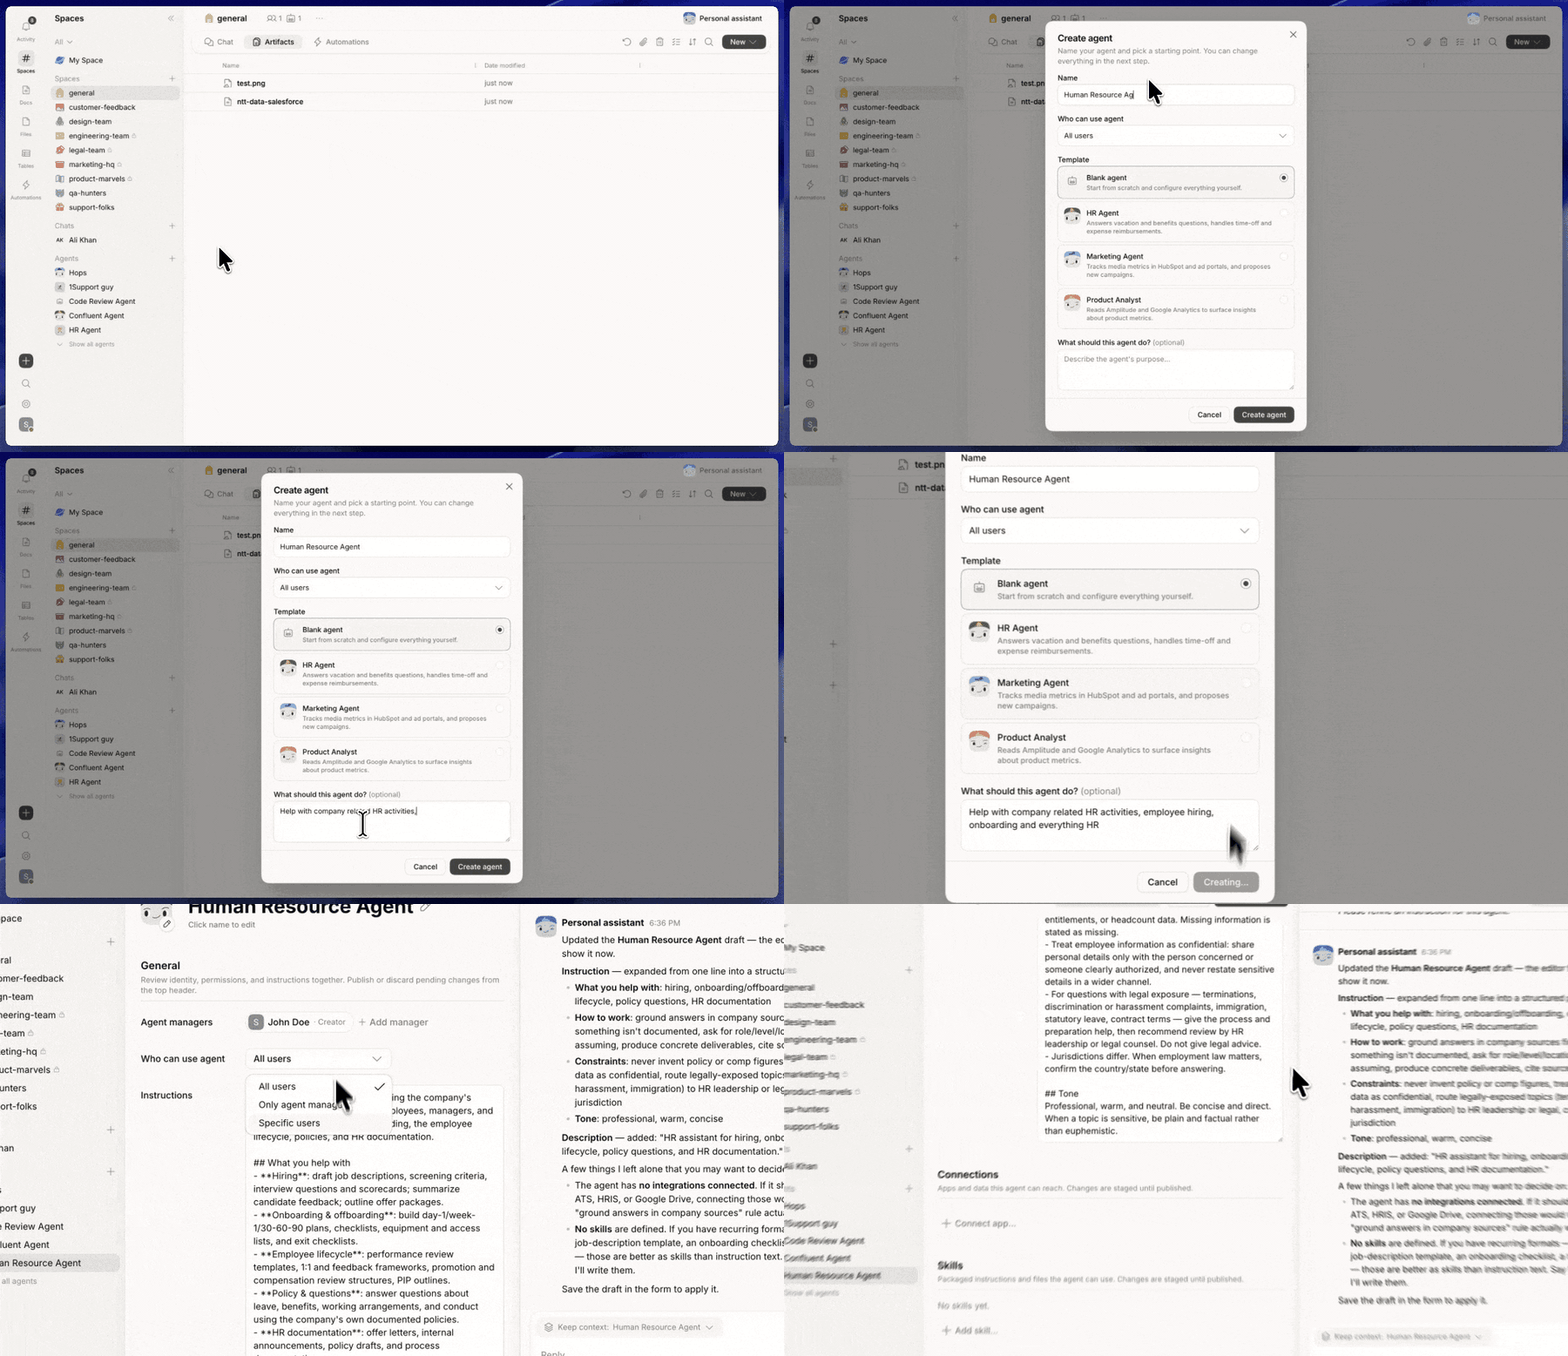
Create a custom agent
1
Start a new agent
Click + at the bottom of the left sidebar and choose to create a new agent.
2
Name it and pick a starting point
Give it a name your team will recognize. Pick a template (Blank, HR Agent, Marketing Agent, etc.) or describe what it should do.
3
Write the instructions
Define the agent’s role, tone, and how it should respond. Use Refine to tighten wording. See the guidance below.
4
Set managers and access
You’re added as the first manager. Add other managers and control who can bring this agent into Spaces.
5
Connect apps
Under Connections, click Connect app to give the agent access to specific tools.
6
Publish changes
Click Publish changes. Open a Space where it’s available and tag it with
@[name].Add a custom agent to a Space
A custom agent isn’t automatically available in every Space — you invite it into the Spaces where it should work.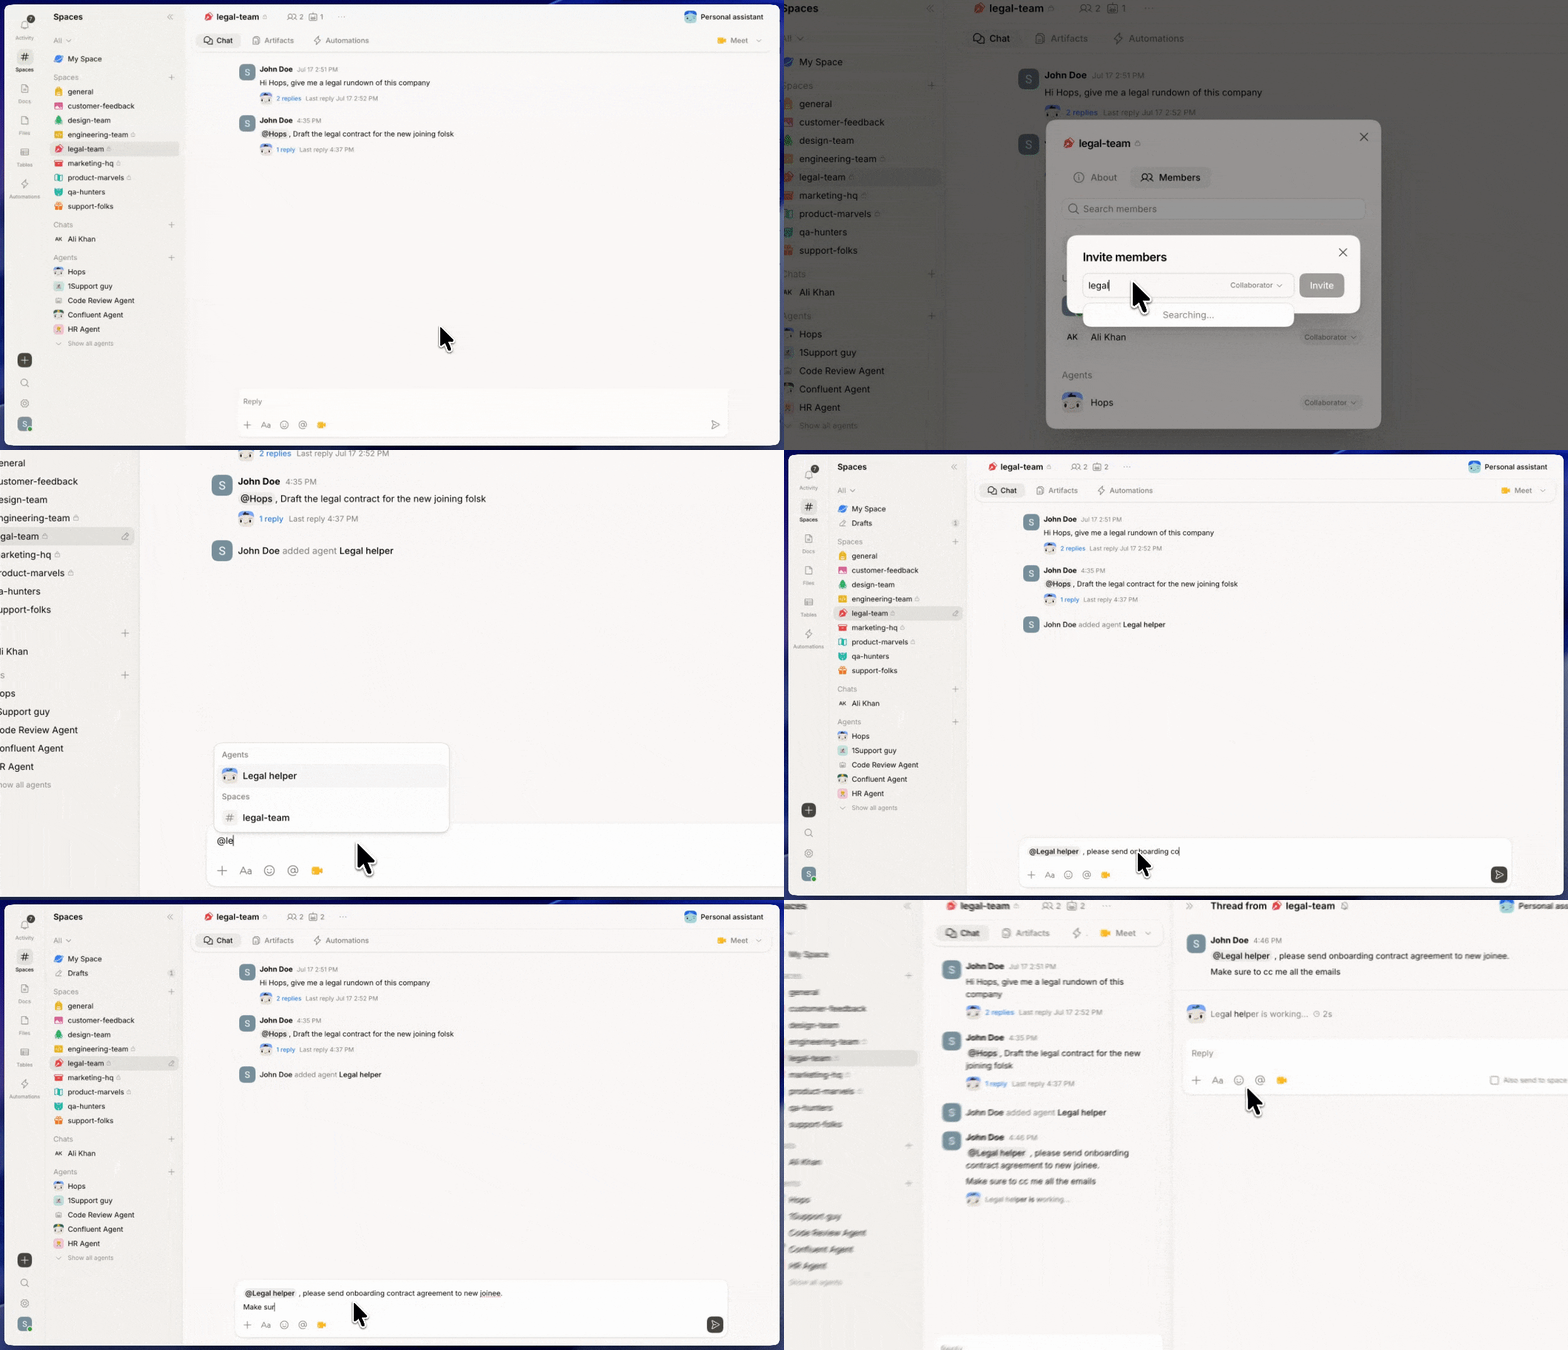
1
Open the Agents panel
Inside your Space, open the Agents tab in the right rail.
2
Add your custom agent
Click Add agent and pick the custom agent you built (or create a new one on the fly).
3
Tag it in chat
In the Space’s chat, tag the agent with
@name. It responds using its own instructions and connections, drawing on the Space’s shared context.Writing good instructions
Instructions are capped at 2,000 characters. Cover:- Role — what this agent is responsible for
- Tone — formal, direct, casual, technical
- Format preferences — bullets, prose, short or long
- What to prioritize — which tools, decisions, or context to lean on
- What to avoid — topics outside scope, assumptions it shouldn’t make